8 March
Before sending a message, check if there are local contact details for a Sri Chinmoy Centre in your country (see the list below). If you don't see your country, then please use this form and we'll make sure it gets to the right person.
For copyright and media requests, you can also use this form.
Local contacts: Australia • Bangladesh বাংলাদেশ • Bosnia and Herzegovina • Brazil Brasil • Bulgaria България • Canada • Czech Republic Česko • Croatia Hrvatska • Estonia • France • Finland Suomi • Georgia საქართველო • Great Britain • Ghana • Greece Ελλάδα • Hungary • Iceland Ísland • India • Indonesia • Ireland • Italy Italia • Japan 日本 • Kenya • Macedonia • Mongolia Монгол • Nepal नेपाल • Netherlands Nederland • New Zealand • Portugal • Puerto Rico • Russia Россия • Serbia • Singapore • Slovenia Slovenija • Slovakia Slovensko • South Africa • United States
• German-speaking countries/Deutschsprachige Länder Germany, Austria and Switzerland
• Spanish-speaking countries/Países de habla hispana Spain, Central and South America
by: Prashphutita A. Greco
All of us have experienced flare in our photographs at one time or another. Often, we are aware of its presence whilst taking the picture. On other occasions, we only realise when it's too late. This collective term "flare" can mean different things. A concise (though incomplete) definition is: fogging caused by internal reflections within a lens and/ or camera body. As we'll discuss later, flare can take many forms. Flare is generally unsought and unwanted, at least by the majority of photographers.
However, you've already noticed that the photographic world is, indeed, strange. Whilst lens manufacturers have constantly sought to minimise the manifestation of flare in their designs, the digital revolution has brought with it the freedom to easily add flare of your own choice to an image that originally had none! You'll frequently see this effect used (over-used/ abused?!) in movies, video productions and even computer games. Film directors (rightly) know how to exploit the symbolism of flares in their scenes; just as well, because all those various filters stacked on the cinematographic lenses lead to increased flare! You can, I'm sure, readily recall how these flares shift across the movie screen in the direction of camera panning.
One reason lens flare is so effective and powerful in an image is that our eyes are instinctively drawn to the brightest highlights in a composition; thus, that flare dominates everything else, even though it generally covers only a small area of the picture. Psychologically, the "language" associated with this kind of light conveys the message of "Too hot to handle!"; severe flare implies that the light is overwhelming in its power.
What if you're not into digital, or don't have the time, money or patience to learn how to drive all that fancy software? Or perhaps you're a traditionalist, or - like me - just plain lazy? Ummm, I mean, you want to do things quickly and easily, with the least possible effort, as well as being able to see (and feel) that you're in control, by having the results appear instantaneously in your viewfinder as you play with some of the myriad parameters. Then you need to make the effort to encourage flare in your optics, rather than automatically striving, by conditioned response, to avoid flare.
Flarey Theory
Lens flare manifests itself in a large number of different possible ways (or even most/ all of them simultaneously!). Principally, these are:
1.) Loss of contrast in your image, particularly in shadow areas, as well as reduced colour saturation overall. This is discernible in your SLR's viewfinder, if you are vigilant when making the exposure.
2.) Appearance of coloured polygons (mimicking the the shape of the lens' aperture blades). This indicates "aperture flare", occurring when light - reflecting off glass and/ or metal surfaces, and even the film during exposure - reaches and subsequently is reflected from the diaphragm blades.
3.) Orange or orange/ red, etc. "blobs", resulting when unintended refraction ("bending" of light) occurs within the lens elements themselves.
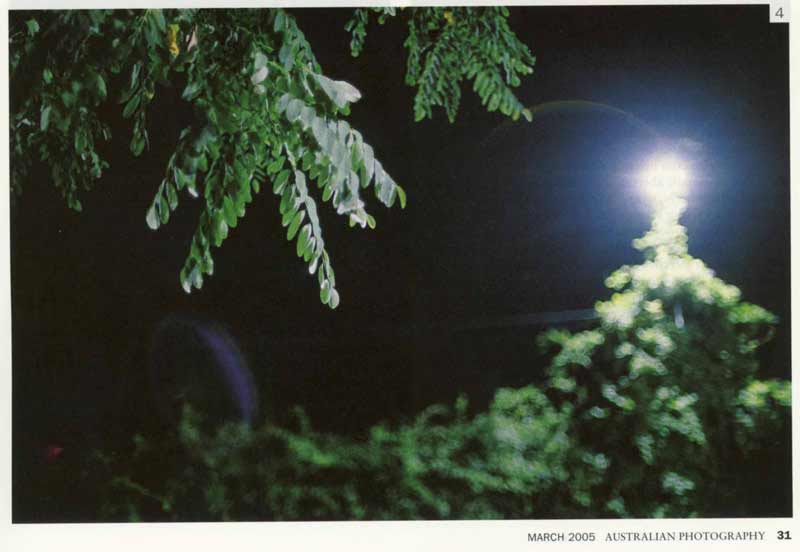
4.) "Rays" of coloured light, emanating from the source of intense light (normally the sun, or a relatively bright source of light in a night scene eg. street lamp)
5.) A "halo" or "sphere" around the bright light source eg. sun.
All of these aberrations are dependent on the lens design (configuration/ construction/ choice of materials/ type and quality of anti-reflection coating(s)/ etc.), and can be exacerbated if you've got filters attached to your lens and/ or have dust/ dirt-covered elements and/ or filters (just think of driving into the sun with a dirty windscreen!). While the technician in you says that any and all flare is bad, your artistic self sees its creative possibilities and inner beauty.
Cheap plastic lenses (eg. as found on one-use cameras) can produce really spectacular flare. Using flash in a dimly-lit room, take a picture of yourself in a mirror to see interesting results when that bright flash light hits the lens!
Photos taken at high altitudes can cause pronounced flare, due to the thin atmosphere allowing through more of the sun's rays. Once again, flare carefully incorporated into your composition can help convey - in strongly emotive terms - that feeling of the sun's power up there on the snow-clad mountain, for instance.
In a picture exposed normally, a bright light source will be recorded on film (or CCD/ CMOS sensor) as white, since it will be so completely over-exposed. A corona usually surrounds the centre of this light source, typically exhibiting numerous streaks, of various shades of colour and/ or some "texture".
Lens diaphragm design, and aperture (f-stop) setting each affect the flares in various ways (quantity, intensity, distribution, etc.). While you can get some indication of final results by using the Depth Of Field preview button on your camera (or lens, in the case of Olympus Zuikos), each film (or imaging sensor) responds to over-exposure in particular ways. Best is to experiment for yourself to see the finished product. Be aware, too, that the number of aperture blades (typically, between 5 and 9) in your lens also interacts with your flare-enrichment efforts. With an odd number of blades, there are two rays emanating from each of the blade intersections (eg. a seven-bladed diaphragm yields 14 rays). However, with an even number of blades, there is only one ray per blade intersection (eg. six rays are produced by a six-bladed diaphragm).
In an ideal world, all lens flares would be hidden when you position the sun precisely in the centre of the frame. However, if the illumination is sufficiently intense, then the lens elements will be "overloaded" and all kinds of interesting patterns, shades of colour, etc. may result. By moving your lens to different angles relative to the light source, the orientation and pattern of flares can be altered, within constrained limits.
As mentioned, the amount, type and "quality" of lens flare varies from one lens to another, according to its engineering and specific optical characteristics. Theoretically, my camera manufacturer's 50mm standard lens ought to exhibit minimal, well-controlled flare, given the small number of simple elements. Yet, in many ways it performs worse than my third party manufacturer, inexpensive, wide-range zoom, with its much greater number of elements of larger, and more complex, design. Perhaps the big-name manufacturer skimped on the anti-reflective multi-coatings (or even omitted them altogether on some of the internal lens elements?)
In general, prime (single focal length) lenses are less susceptible to flare than zooms, which - by their nature - are complicated affairs with many lens elements, each with associated air-to-glass interfaces. My 100mm, f/4 macro lens, with its elegantly simple optical formula and very well recessed and baffled front and rear elements, has never exhibited any flare when pointed directly at the sun.
Metering
With an intense, localised source of light such as that which produces flare, the camera's meter will be fooled into under-exposure. Take, and lock in, a reading from a part of the scene well away from the light source. You'll probably find quite a few stops more exposure are required, compared with including the light source when metering.
Safety Warning!!!
All the usual precautions apply with viewing the sun at any time, particularly when using long focal length lenses (eg. 100mm or greater), as these "concentrate" the sun's rays. When the sun is near the horizon and/ or covered by clouds, fog or mist, there is less danger. But, don't stare at the sun through your camera's viewfinder: irreparable damage can be done to your eyes by the UV rays before you even realise!
Danger with Digital!
If yours is a digital camera, its CCD or CMOS sensor could be "zapped" by being subjected to intensely bright sunlight. Consult the manufacturer and/ or exercise caution!
In Practice
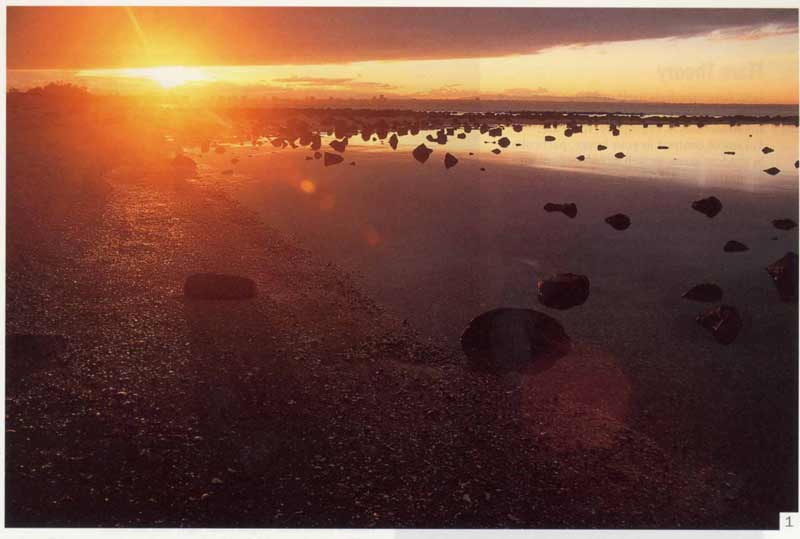
The example pictures accompanying this article were chosen on the basis of what would likely show up reasonably well in magazine repro; flare phenomena often also have quite subtle (ethereal?) components/ aspects.
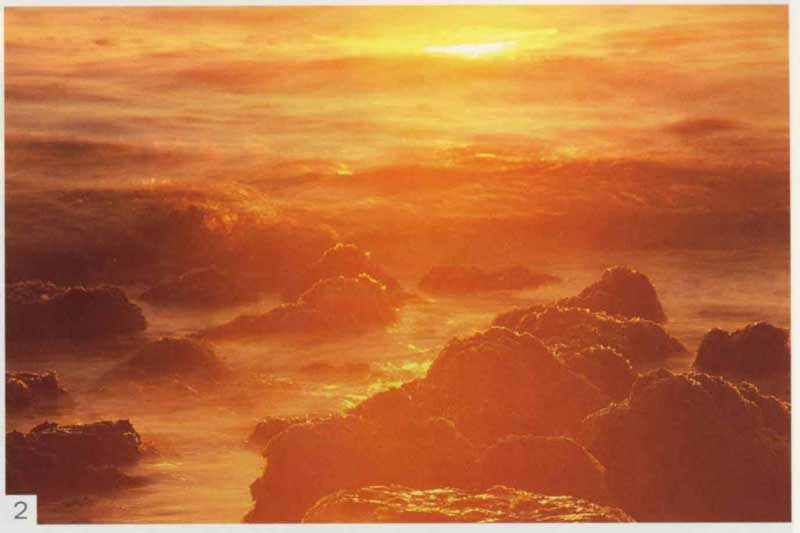
Image 1, taken with a standard, or, normal (50mm) f/1.8 lens, displays plenty of polygons, which exist on an imaginary line drawn between the sun and the lens. These flares were carefully arranged to align with the shore by adjusting the camera angle. Image 2 was created using the same lens, stopped down to f/22, with the sun positioned centrally. Note the distinctive blue corona, typical for this particular lens. Almost invariably, we're advised to avoid the harsh midday sun; here's one way to take advantage of it!
<<<<<<<Note: may be oriented vertically or horizontally, according to magazine layout requirements>>>>>>>
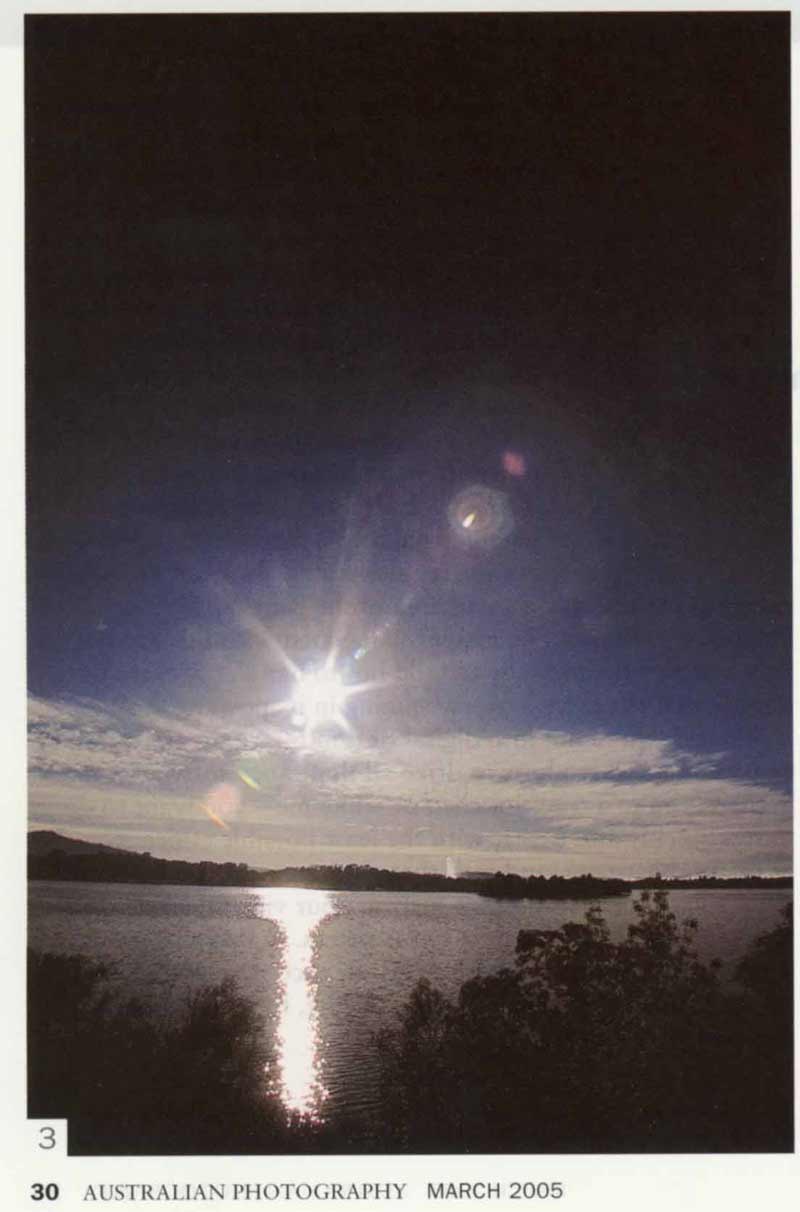
Image 3 illustrates how that same normal lens manifests different flare effects according to the orientation/ intensity of the light source it is imaging. Here, I enjoy the pencil-like orange streaks. Image 4 shows distinctive and very different looking flare artifacts from a "fast fifty" (50mm, f/1.4); night scene, illuminated by a mercury high intensity discharge lamp. Such large aperture lenses are inherently more flare-prone, with their bigger surface area front "glass" and more individual lens elements. This weakness was exploited here to transform a pedestrian scene into something more evocative of evening mood. Distortion, yes... but so pretty! My Olympus Zuiko 50mm, f/1.4 shares certain characteristic traits along with the Canon lens, whilst maintaining its own "personality"; I can identify each lens from the flare produced.
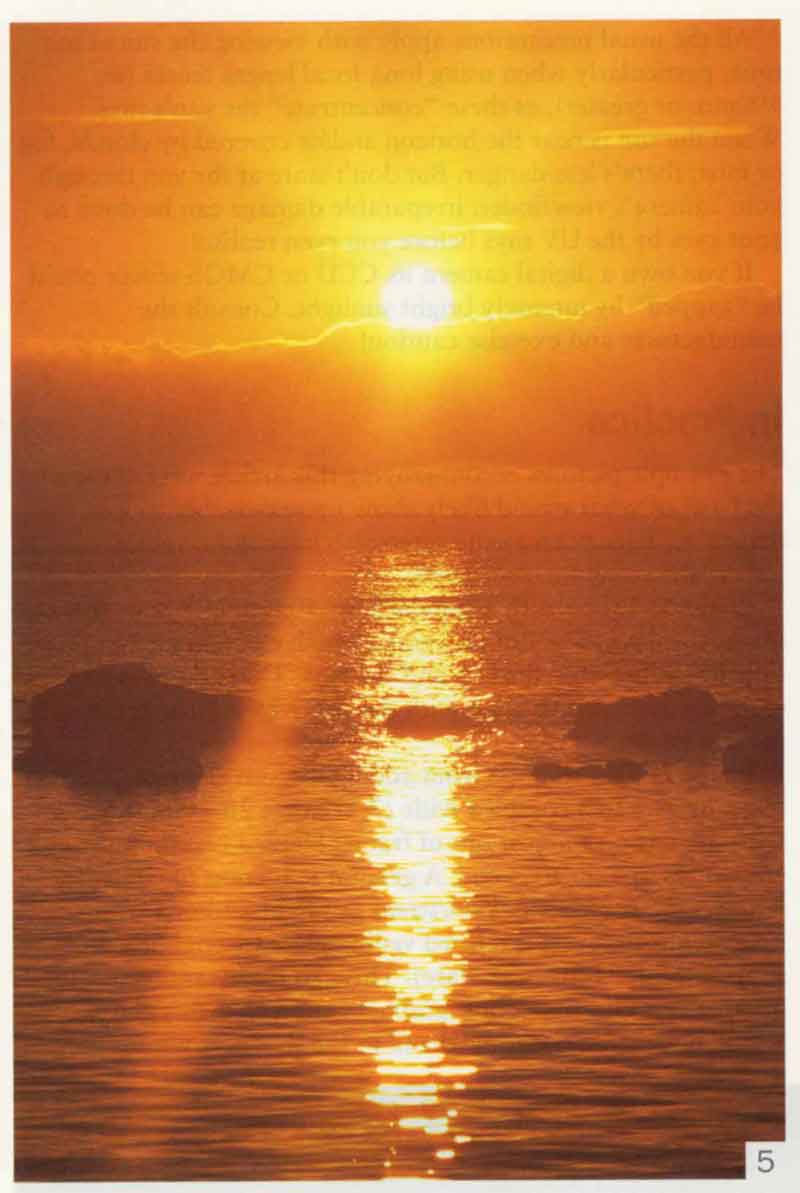
Image 5 was created by positioning a 28mm, f/3.5 fixed focal length (prime) optic such as to maximise the flares. Too much? Perhaps, but, in many ways, I like it. Besides, I "bracketed" compositionally by taking other shots which didn't produce so great an amount of flare.
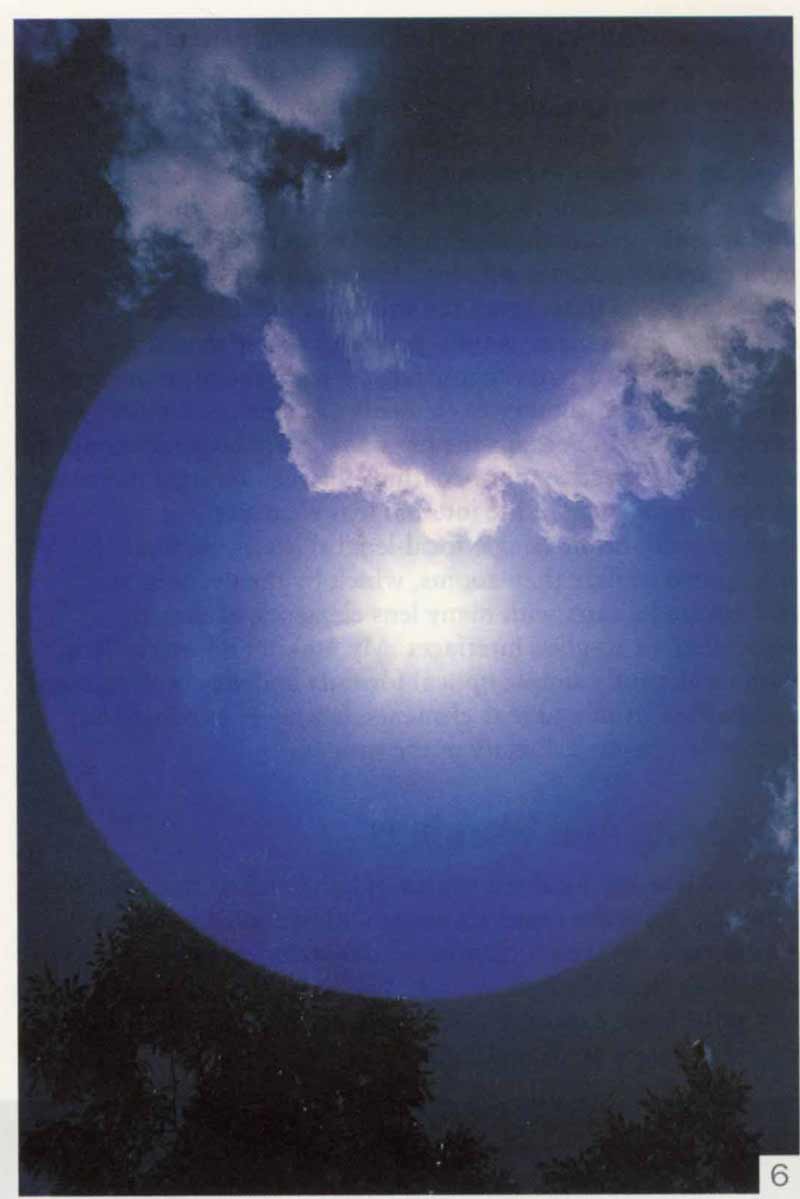
As expected, very different looking from the previous photo are the results from a 19-35mm wide-angle zoom, with UV filter, pointing at the overwhelming noon sun in Image 6. Since wide-angle lenses gather light from such a broad angle of view, and have a more complex optical design, they tend to be highly susceptible to flare. Stopping down the diaphragm to f/22 at the 19mm setting yielded the greatest possible diffraction effect, giving a six-pointed "super-nova".
<<<<<<<Note: may be oriented vertically or horizontally, according to magazine layout requirements>>>>>>>
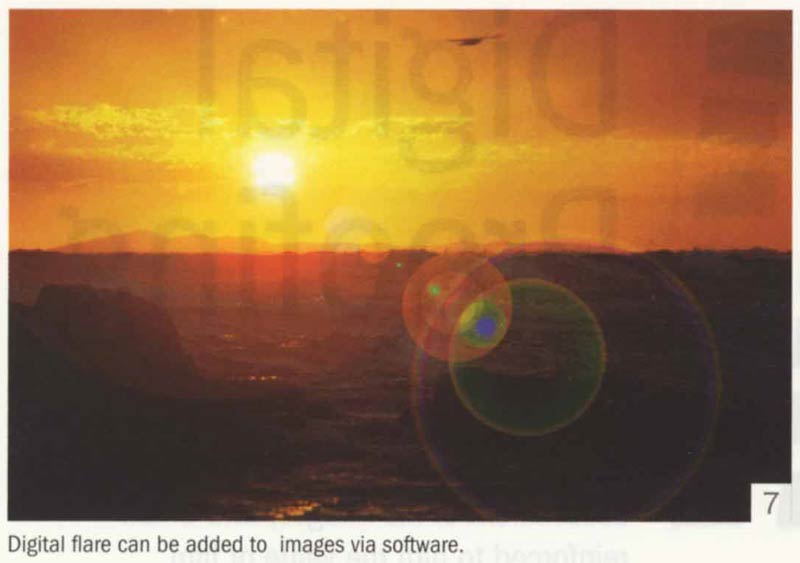
Again, that same wide angle zoom "behaves" differently in Image 7; here, displaying chromatic aberrations (false rendition of colour), amongst other effects, when imaging a rising sun. Not accurate, but lovely in its own way.
With Image 8, a 200mm, f/4 prime telephoto lens exhibits its idiosyncratic, individually characteristic behaviour when "blasted" by powerful sun. When I don't wish to have such strongly pronounced flare, I can choose to photograph when the sun is at least partially obscured by the horizon and/ or clouds/ fog. In this instance, I wanted those prominent rays, which remind me of "God's Fingers" (crepuscular rays), when the sun is almost totally blocked by clouds, as frequently depicted by artists down the sweep of centuries.
Image 9 resulted from adding a seven element, 2X teleconverter to a complex, wide (7:1) range 28-200 mm zoom, with the setting sun just out of frame. Here, a certain mystique enshrouds this sunset scene. A general reduction of contrast, without the presence of rays/ streaks of light and/ or various bright "ghosts", etc., is termed veiling glare (though it's often simply "lumped-in" with flare). This can be advantageous in many ways. Old-time photographers knew that this glare would help bring out some detail in the shadows within their compositions . Also, an overall "softening" of the image results; very useful for portraits, as an example! Therefore, these wise artistes chose flare-prone lenses eg. those optics which are not multi-coated.
Image 10 shows the same teleconverter/ zoom combination, this time with a bright rising sun within the frame. Arranged on a diagonal leading to the lower left-hand corner of the frame, the row of flares adds interest and sense of drama to an otherwise minimalist image.
After the Fact...
Alright, now you're enthused about flares... but don't want to spend the time to go out and take "flarey" versions of your favourite, iconic images? Then get some flare plug-in filters for your favourite image editing program(s)! While not as good as the "real thing", this can still look very effective (unless you start scrutinising with a keen eye and discerning mind!). No lenses I have ever used produce results like the "clinical perfection" of computer-generated flares. Of course, the software is programmed based on mathematical formulae which attempt to model (simulate) real-world lens behaviour.
Since it never "happened" in terms of a moment in time, be sure to let the world know this is a manipulated image. Suitable software needn't cost you any money, either: there's some excellent free stuff available on the Internet. For an extremely competent, comprehensive and fast image viewer (and more!), with somewhat limited editing capabilities, download IrfanView from
Whilst Adobe's formidable Photoshop ships with its own lens flare filter, this gives you limited options. Lens Flare 32, by Axion Software, works just like other Adobe filters, and can be used with any graphics program supporting Adobe 4.0+ plug-ins (such as IrfanView). You may tinker with 22 individual flare parameters using this remarkable plug-in! Go to
Try it; you'll like it!
Adding some interest to an otherwise humdrum scene, Image 11 shows one of an almost unlimited number of possibilities with Do-It-Yourself lens flares. For maximum compositional flexibility, I strongly recommend creating another transparent layer for the lens flare effect within Photoshop (or whichever image editor you use). This way, you can better judge and adjust the position, relative intensity, etc. of the effects. Fill the layer with black, then choose "screen" as the blending mode. When "dropping in" flares, remember to ensure that they appear to be coming from in front of the camera's position, since flares occur when a lens is facing into the light source.
Old-School Rule
For over a century, photographers have been instructed: "Always shoot with the sun behind your back!" This was sage advice, enabling the successful capture of good "record" shots, especially when early, uncoated lenses exhibited very high levels of flare. For those prepared to "live dangerously", there are many exciting flare-flooded images awaiting when this dictum is consciously disregarded.
Did You Know...?
No lens can ever be totally flare-free. Anti-reflective coatings - even multi-coatings, calculated for various, specific wavelengths of light - are never completely effective. Some of the light striking each air-to-glass interface will be reflected... possibly ending up on your film (or digital sensor array). Hasselblad have a compendium square lens shade, designed to be extended to the maximum extent possible before vignetting occurs.
Seen in All the Best Places?
There is currently ongoing debate about whether NASA's Apollo missions really did land on the moon. Whatever truths may emerge, we can observe some of the "official" pics and notice lens flares featuring prominently from the finest (read: über-expensive) Zeiss optics- an authentic, photographic touch from the American desert "moon" studio?!
Conclusion
It's time to approach your photography with a different mindset. Rather than constantly fighting against flare, make it your friend and seek out new, creative ways to exploit its characteristics and appearance in your images. Lens flare, incorporated in an appropriate manner with a suitable subject, has its own inherent aesthetic appeal. A whole new world of sparkling, flare-enlivened possibilities beckons you; have fun as you play!
* * * * * * *
First-hand experiences of meditation and spirituality.


interviews with Sri Chinmoy's students


Except where explicitly stated otherwise, the contents of this site are licensed under a Creative Commons Attribution-NonCommercial-NoDerivs 3.0 Unported License. read more »
SriChinmoyCentre.org is a Vasudeva Server project.