Inside secrets for extracting the best from your slide films...
by: Prashphutita A. Greco
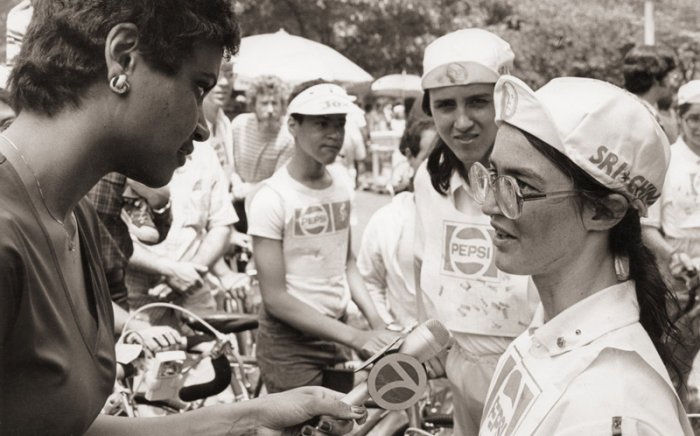
I first met Nick Kemp the jovial expatriate Briton when I swapped labs to Bond Imaging, conveniently located a brisk 15 minutes' walk from where I live (and work) in the Melbourne suburb of Richmond. Often arriving to collect my work just as he was locking the premises at the end of the After Hours service period, I'd have a chance to discuss many and varied important matters within that vast realm which is photography. I'd walk away thinking: "Gee, this bloke really knows his stuff!" It turns out that not only is he a very fine E-6 technician, but came to this job after having been a commercial photographer in a previous incarnation.
So how and why did he end up dipping and dunking, rather than being the one lighting, posing, directing and (eventually) clicking the shutter on large format cameras? Simple: while working in Queensland, Nick found the standard of work being done for him by the Labs was unacceptable. Knowing what was achievable -- nay, essential -- in this industry, Nick decided to splash around with the chemicals himself, so that he could finally see quality results! If you talk the talk, you gotta walk the walk...
According to Nick, satisfyingly spectacular (and spectacularly satisfying) results from transparency (slide, colour reversal, positive or chrome) film are not at all a hit-and-miss affair. You can make your work of a consistently high (and enviable!) standard. Of course, that's easy when you've got a commercial photographer's training, background and experience, as well as many long years spent working on the other side of the counter. After protracted discussions and negotiations with management at his Lab, Nick was finally given permission to reveal his secrets to you. Neither of us have yet found this topic -- and the insights disclosed -- covered in any other magazine. I can see you're champing at the bit, so let's get straight into the question and answer session...
From 1 to ... E-6
I asked Nick for a brief overview of the E-6 process. He started by explaining: "This is Kodak's name, whilst Fujichrome refer to their process as CR-56 ("Colour Reversal"), and Agfa call theirs AP-44 ("Agfachrome Process"). Negative formation occurs in the First Developer, which is the most critical stage. All "pushing" and "pulling" (see later) happens in this bath. Nominal temperature here is 38 °C (compare that with 20 °C for B&W processing). "Normal" development time is 6 minutes.
Next, Wash, which stops any further development. The wrong temperature here would give a red or cyan shift in the end result. After this, Reversal fogs the undeveloped part of the film. Following this, Colour Developer acts to develop the fogged part of the film. The First Developer has only affected the silver in the latent image, thus it is a negative mask. Fogging renders the rest of the film developable; the colour developer can now go to work and produce the image which will be the end result.
Subsequent processing removes the developed silver and washes the chemicals out of the film. These are: Pre-Bleach; Bleach; Fix; 2nd Wash; 3rd Wash and Final Rinse." Hence, the six steps of E-6!
Quizzing Nick as to why the correct exposure is more critical for E-6 process films than C-41 (Colour Negative) films, Nick responded that: "With negative film you can compensate for over- or under-exposure at the printing stage. However, with transparency film, what you expose in-camera is the end result. Although negative film does have a wider exposure latitude (see later) than transparency film, the best exposure for all types of film is still based on the same criterion: it ought to lie on the straight-line part of the characteristic curve and encompass the highlight and shadow details you require." (Refer to the Technical Data Sheets for your chosen films).
Wondering what the most common mistake was that people make with their E-6 films, Nick's answer was, initially, somewhat surprising: "Not knowing their equipment!" Nick elaborated: "You have to test it with the film beforehand. Shoot a roll at different f-stops and check the results, then adjust your exposure. Be aware that not all equipment is accurate!"
This prompted me to ask what the worst possible error was. Again, an insightful response: "When the photographer doesn't know that they've made one!" Nick expanded on this, saying: "We can correct for up to an absolute maximum of 4 stops of under-exposure (pushing), and 1.5 stops of over-exposure (pulling). This is a save only, and not recommended; the results won't be as good as unpushed or unpulled film."
This lead to querying Nick as to what were the important things to be aware of when using tranny film. His considered response was "Lighting and scene brightness ratio" (the range of intensity between the brightest and darkest parts of the scene). I've illustrated this with Image 20.)
With a vested interest in wanting to improve the standard of my own work (as we all do!), I sought to ascertain from this fount of experience what would be required to achieve the ultimate image potential which a high-quality film stock is capable of. Nick's list, in order, runs thus:
1.) Good lighting (see Images 5.) and 6.);
2.) Reliable light meter;
3.) Excellent lens;
4.) Accurate shutter and aperture;
5.) Fresh film;
6.) Process the film without delay at a reputable lab (otherwise, the latent image begins to deteriorate the longer the film is left unprocessed).
My next question - Nick's favourite film(s) for his personal work - delivered the answer: "I pick a film to match the subject and lighting conditions." Ah, yes... simple yet highly profound. It's worth re-reading that statement! Refer to Images 7.), 8.), 9.) and 10.)
I mentioned that I generally use Fujichromes, but get good results here, at a Kodak Lab. Enquiring about Kodak Q-Lab Service, the worldwide system of process control for professional E-6 lines, Nick
explained: "Kodak control strips (see Image 21.) ) are more sensitive to chemical changes than Fuji's, so that - along with the tighter specs. for Q-Lab - must mean that we can optimise the film's capabilities. As to whether there is a colour shift or not, is hard to discern as none of the Q-Labs can have a visible colour shift and still remain within their specs."
Reminiscing on one of the main reasons for my switching Labs, I enquired into how a Dip and Dunk system achieves non-contact with the film at all stages of the process. Nick's reply: "With Dip and Dunk, the film is suspended from a rack; this is lifted up and then dunked into the chemical baths. At no time during the processing is the film in contact with a hard surface. We also break open the film cassettes to remove the film, as pulling it out will cause scratching if there is dirt on the felt light trap of the canister."
Hmmm... what about when the automatic slide-mounting machine takes over? "The slide mounter transports the film by the sprockets into the mount, so at no time is the emulsion touching anything that can scratch it. Incidentally, we have tried to scratch test films in the mounter, as yet with no success. This was in response to customers saying: 'You have scratched my film in the mounter.' We simply can't!"
Given the ever-increasing number of "people who dabble with digital", I ventured onto the topic of scanning films. With the improvements in scanning technology, I wondered if there were still some advantages in shooting on chrome film as against negative film? "The boys in the Digital Department tell me that tranny is easier to scan than neg., because there is no masking. Each neg. type has a different colour mask, usually an orange hue. This, along with a relaxed attitude to exposure ('They can fix it in the printing!') makes life difficult. Technically, tranny film has a bigger dynamic range. That means more details in the highlights and shadows. Also, the colours are all within a similar density range, unlike neg. film where each colour is different by about 50 points (that is, 1.5 stops). This is to help with the printing, because of the mask."
One thing which had always amused me was the number of Pros who'd arrive at 5:30pm on a Friday - arms laden with films from the day's shooting - and ask to have a "clip test" on each of those rolls. To be ready, of course, by that evening. I'd often joked with Nick that, obviously, they'd never studied "Exposure 101" at College. Reminding him of this, Nick replied: "Clip tests are a Pro's safety blanket. It is a way they can check nothing has gone wrong. After all, their livelihood depends on a perfect result every time! If you're shooting outdoors, the lighting changes constantly. So, while the light meter reading will get you into the Footy ground, the clip test will guarantee you the best seat! A clip test involves cutting off a short bit of your film and processing it so it can be assessed and the rest of the film pushed or pulled accordingly. The size of the clip depends on the frame size."
"Pushing" means that a film which was under-exposed is left in the First Developer for longer. Conversely, "pulling" involves taking an over-exposed film out of the tank earlier than normal. Nick further added: "It's also a little-known fact that the film's speed itself is only guaranteed to be within half a stop, even for batches with the same emulsion number. Read the fine print on a box of Kodak pro film! Thus, for critical applications, it doesn't help you even if you bought a huge amount of film from the same batch and stored it in your fridge."
Asking for quantification on how much loss of image quality occurs with pushing or pulling elicited this response: "Pulling a film will reduce the contrast. So the more you pull it, the muddier it looks and tends towards a yellowish cast. On the other hand, a little pushing of a film can enhance the image by cleaning up the highlights and bringing detail into the shadows (up to 1 stop). Most films will not show a significant colour shift until 3 stops, by which time the Dmax (see later) is dropping out. The colour shift will depend on the type of film used, the subject and light source. In tests using flash on Kodak film, the colour shift tends towards the red. Fujichrome trend is more yellow, while Agfa seems to become more natural.
What advice would Nick give to someone who's never shot on slide film before? "Start by shooting a test film first! Bracket (vary the exposure) for the all-important shots, if possible. If not, have a clip test done! Ask the Lab to help evaluate the result; this will save you time and money in the long run. Buy a batch of film and test one of those: going back to the shop later to buy another film will mean that it's different again."
Pondering how image quality would be impaired if the E-6 chemistry weren't fresh, Nick said: "I don't know from experience because it hasn't happened here. The technical manuals show different effects for each bath. If either of the developers or the reversal bath have oxidised, the result can be disastrous as this cannot be fixed. The rest can be repeated. Incidentally, we don't use fresh chemistry, as it would be too strong: the correct term is "seasoned" chemistry. This is mixed in very accurate proportions, according to the manufacturer's instructions."
Backtracking, I asked Nick to explain the meaning of a parameter he'd mentioned earlier - Dmax - along with other related, commonly-used terms. (See Image 21.) ) "Going from darkest to lightest on the tranny: Dmax is the darkest part of the film (unexposed). Dh is about 5 to 6 densities darker than mid grey (detailed shadows). Dl is one density above mid grey (mid-tones). Dt is the Toe Density: 1 density above base fog (detailed highlights.) Dmin is the base fog (specular - or mirror-like - reflections)." You'll see these on the D-H (Density versus Illumination) curves published for each film by the manufacturer.
With a view to wrapping-up, yet extracting (hopefully) a few more gems of wisdom, I enquired how one could obtain the absolute best results each and every time? "Standardise your lighting and check your equipment. Use fresh film, particularly for Pro emulsions, not one that has been out of the fridge for weeks on a retailer's shelf or in your camera bag. Process exposed film as soon as you can. You'll be 9/ 10ths of the way there!"
It only struck me afterwards: Nick mentioned "lighting" half a dozen times during our discussion. Probably understandable for a commercial photog. used to setting up big arrays for illumination. Yet, this is, after all, the very basis of our art and craft: "to draw with light". If you can advance your discipline in achieving wonderful results on the unforgiving medium of tranny stock, then - rest assured - you've really understood what photography is all about.
Acknowledgements: Special thanks to Nick Kemp, E-6 Processing Dept., Carolyn Nankervis, Sales & Marketing Manager and Doug Porter, Production Manager at Bond Imaging, Richmond, Victoria.
Equipment Details
Unless otherwise specified:-
Canon EOS A2E used with: Manual Exposure; Manual Focus; Spot Metering; Mirror Lock-up;
Remote Cable Release; Tripod
Captions
Image 1 Roundup: All the Usual Suspects A few of my favourite chromes! There's an emulsion to help you express your artistic vision. Each has its own characteristic "look", comprised of such aspects as colour saturation, contrast, colour palette, sharpness, grain size, etc.
Tripod-mounted Canon FTb(n) used with aperture pre-fire, MLU and cable release; Canon FD breech-lock 100mm f/ 4 Macro lens; Pentax Spotmeter V
Agfa CT Precisa, rated normally at ISO 100
Image 2 Spotlight on Provia Tranny film helps your pricey, class glass reveal its ultimate potential (provided, of course, you back that up with good technique!)
Tripod-mounted Canon FTb(n) used with aperture pre-fire, MLU and cable release; Canon FD breech-lock 100mm f/ 4 Macro lens; Pentax Spotmeter V
Agfa CT Precisa, rated normally at ISO 100
Image 3 Shady Characters? In fact, they're reliable, hard-working and trustworthy, yet each with quite different personalities. As a general preference, I'll under-expose slightly (frequently, even more again, for added drama). Slight under-exposure benefits tranny film (opposite to negative film!), allowing it to record a little more detail. Over-exposing, to the extent of "blowing out" the highlights, means detail is irretrievably lost: the film goes to its base fog level. If the detail is there, it can always be retrieved by the scanner. Personally, I prefer a moderate amount of under-exposure, as illustrated here.
Tripod-mounted Canon FTb(n) used with aperture pre-fire, MLU and cable release; Canon FD breech-lock 100mm f/ 4 Macro lens; Pentax Spotmeter V
Agfa CT Precisa, rated normally at ISO 100
Image 4 Cheap Thrills Nothing beats transmitted light images! Reflected light viewing of images (eg. prints) can never match the experience of viewing the original film exposed in the camera.
Tripod-mounted Canon FTb(n) used with aperture pre-fire, MLU and cable release; Canon FD breech-lock 100mm f/ 4 Macro lens; Pentax Spotmeter V
Agfa CT Precisa, rated normally at ISO 100
Image 5 Azaleas Alive! Diffuse light from a bright overcast day best suits this delicate floral subject, to avoid harsh shadows.
Canon EF 50mm, f/1.8
Fujichrome Provia 100F, pushed 2 stops to EI 400
Image 6 Lighting by El Sol Late afternoon light, pouring in through west-facing windows, helped fill-in what would otherwise have been unsightly shadows earlier in the day.
Tokina 19-35mm, f/3.5-4.5 at 19mm, f/22
Fujichrome Provia 100F, pushed 2 stops to EI 400
Image 7 Dull Day, Bright Colours Overcast conditions prompted me to add some extra "oomph" by pushing this reasonably-punchy film 2 stops to further increase its contrast.
Canon EF 50mm, f/1.8
Fujichrome Provia 100F, pushed 2 stops to EI 400
Image 8 Subtle Hues? Go Pro! Pro emulsions allow rendering delicate variations in tonality. Also, the "Vivid Colour" characteristic of this particular film suited this sunrise scene.
Sigma 28-200mm, f/3.8-5.6 at 200mm
Kodak VC160, rated normally.
Image 9 Sharp, and to the Point Delicate shades of green in Nature's design demanded a lower contrast film.
Canon EF 50mm, f/1.8
Agfa CT Precisa, rated normally at ISO 100
Image 10 Classic Camera, Cult-Classic Emulsion With low levels of artificial light - and taken through thick, shopfront glass - I required a film which would add some much-needed punch, as well as slightly "warm" the scene. Warming filter and polariser? Not necessary. Believe the hype: it's gotta be Velvia! Long live the King of Chromes!
Tripod-mounted Canon FTb(n) used with aperture pre-fire, MLU and cable release; Canon FD breech-lock 100mm f/ 4 Macro lens; Pentax Spotmeter V
Fujichrome Velvia, rated normally at ISO 50
Image 11 Velvia's Version of Reality Battle of the Wonderchromes! Compared with the subsequent Provia rendition, Velvia produces a more "orangey" yellow and "richer" greens, etc. Many disciples of RVP emulsion rate it at EI 40 or even EI 32, due to it reproducing tones much darker than any other film. Personally, I stick with its nominal ISO rating of 50, since I like those dense trannies. Here, I pushed Velvia 1 stop, not because I wanted even more contrast (!), but to help arrest the motion of swaying leaves.
Sigma 28-200mm, f/3.8-5.6
Fujichrome Velvia, pushed 1 stop to EI 100
Image 12 Provia Emulating Velvia? Attempting to approximate the Velvia "look", I pushed RDP III by 2 stops, to further increase its contrast. Overall, since this scene could cope with Velvia's high contrast, I preferred the velvety smoothness of Velvia. Note: Magazine reproduction may not allow all the subtle differences to be discernible! Hint: Burn some film and compare for yourself!
Sigma 28-200mm, f/3.8-5.6
Fujichrome Provia 100F, pushed 2 stops to EI 400
Image 13 Green Scene a lá Velvia RVP's handling of greens is, to me, as yet unchallenged by any other emulsion. Here, even in magazine repro., we can readily discern all the various shades of Nature's predominant colour. That old rule of thumb - to judge a film's greatest strength from the colour of its packaging - holds true here.
Canon EF 50mm, f/1.8
Fujichrome Velvia, rated normally at ISO 50
Image 14 Sensia's Subtlety Excels! Since I was handholding the camera and needing to stop down an old optic to obtain better performance, I'd loaded Sensia ISO 100. This has a more generally useful speed than Velvia (which many aficionados rate at ISO 40 or even 32). Sensia handled the subtle green tones beautifully (and to my satisfaction!). Unsurprising, really: Sensia is the common man's version of Provia, a pro emulsion. Need convincing? Take some photos... or compare their respective characteristic curves.
Canon FT (manual, stop-down metering); Canon FL breech-lock 50mm f/ 1.4 lens; Pentax Spotmeter V
Image 15 Sunrise Surprise (I) Nominally "correct" exposure; compare this with the next image.
Sigma 28-200mm, f/3.8-5.6 at 200mm
Fujichrome Velvia, rated normally at ISO 50
Image 16 Sunrise Surprise (II) You call the shots! With trannies, the film you expose is the finished product, not some photofinisher's idea of what you intended. Want to add even more drama? Then underexpose, thereby further saturating the colours!
Sigma 28-200mm, f/3.8-5.6 at 200mm
Fujichrome Velvia, rated normally at ISO 50
Image 17 Assigning Tonality (I) Autumnal scene, with exposure as would typically be chosen by camera's meter. Since you're using slides, you can pick a tone - any tone - you prefer! Compare with the following images. I like all of the resultant slides: each has their own particular aesthetic appeal, creating a different mood and eliciting a slightly varying emotional response from the viewer.
Tripod-mounted Canon FTb(n) used with aperture pre-fire, MLU and cable release; Canon FD breech-lock 200mm f/ 4 SSC lens; Pentax Spotmeter V
Kodak Elite Chrome Extra Colo(u)r II, rated normally at ISO 100
Image 18 Assigning Tonality (II) Slight under-exposure boosts colour saturation.
Image 19 Assigning Tonality (III) Slight over-exposure reduces colour saturation (and risks "burning out" the brightest highlights).
Image 20 Tranny Film's Limited Exposure Latitude {6X7cm} Transparency film has an exposure latitude (range of light levels over which it can record detail) even more limited than that of negative film. I chose Fujichrome's RDP III as it has an exposure latitude 1 stop better than RVP (Velvia), ascertained from the respective slopes of their characteristic curves. Although it may not be so readily discernible on the magazine page, the highlights were getting very close to "blowout", whilst the deepest shadows were nearly "blocked up".
Tripod-mounted Mamiya Super 23 Rangefinder with 6X7cm back; Mamiya-Sekor 100mm, f/ 3.5 lens
Fujichrome Provia 100F, pushed 1 stop to EI 200 (I needed a motion-arresting shutter speed for the flowers in shadow)
Image 21 Process Control Test Strip Run on a regular schedule, these help ensure that the E-6 process is "in control". Squares show the greyscale, from maximum (near-black) density to minimum density (almost clear); also, squares for Cyan, Magenta and Yellow (complementary colours to Red, Green and Blue, respectively).
* * * * * * *