8 March
Before sending a message, check if there are local contact details for a Sri Chinmoy Centre in your country (see the list below). If you don't see your country, then please use this form and we'll make sure it gets to the right person.
For copyright and media requests, you can also use this form.
Local contacts: Australia • Bangladesh বাংলাদেশ • Bosnia and Herzegovina • Brazil Brasil • Bulgaria България • Canada • Czech Republic Česko • Croatia Hrvatska • Estonia • France • Finland Suomi • Georgia საქართველო • Great Britain • Ghana • Greece Ελλάδα • Hungary • Iceland Ísland • India • Indonesia • Ireland • Italy Italia • Japan 日本 • Kenya • Macedonia • Mongolia Монгол • Nepal नेपाल • Netherlands Nederland • New Zealand • Portugal • Puerto Rico • Russia Россия • Serbia • Singapore • Slovenia Slovenija • Slovakia Slovensko • South Africa • United States
• German-speaking countries/Deutschsprachige Länder Germany, Austria and Switzerland
• Spanish-speaking countries/Países de habla hispana Spain, Central and South America
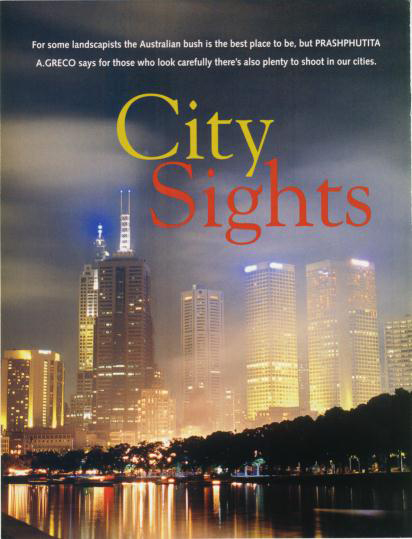
In the city are plenty of pictures waiting to be taken...
by: Prashphutita
Where do you turn to when you're after a new photographic challenge? Since the vast majority of us reading this magazine live in (or at least near) a major city, how about that as a subject? "But... it's totally drab and uninspiring!", I hear you say. Usually, because something has become so familiar to us, we identify it simply by a particular name eg. "bridge" or "office block". Our camera knows none of these words; it is only capable of registering an image of whatever it's put in front of. Set your mind free to roam and you'll come up with an endless stream of ideas for interesting images.
Infuse the resultant pictures with your personality and achieve results that'll make people want to take a closer look: they'll wonder why they've never noticed anything like that before! Therein lies the true miracle of photography, that it can help you manifest your inner vision in your own uniquely individual way.
Where in the World...
Must you travel to a metropolis such as, say, Manhattan (see Image 1), to find worthwhile subjects to photograph? All of the remaining images accompanying this article were deliberately taken in and around my home city, Melbourne, just to prove the aphorism: "Seek, and ye shall find". The word metropolis derives from two Greek words, meaning, literally, "mother city". Exactly the same techniques and approach can be applied to a small town as to the biggest capitals, with equal success.
The Pedestrian Principle
Here's a handy hint: when doing city photography, leave your car at home! By being forced to perambulate everywhere on foot, you have greater opportunity to astutely observe your urban landscape, making mental notes of potentially photogenic places. By keenly studying how the light plays on your city subjects, you can ascertain the best time of day to return, when the scene "comes alive".
Painting Buildings in a New Light
What techniques will you employ to best bring out the inherent beauty of man-made structures? Easy: apply the same principles as used in landscape photography! You've already studied plenty of those in this magazine.
Light changes everything. A facade which normally looks dull and lifeless can be transformed by low-angle, raking light at sunrise or sunset, bringing out the texture, defining form and imparting "warmth".
Modern architecture, with its highly reflective surfaces and acres of glass, can look particularly stunning if you place yourself to catch the light reflected from that building. You'll need to work out the location for yourself, according to the sun's position in the sky as it varies with the seasons. Remember the physics formula: Angle of Incidence equals Angle of Reflection, to guide you as to where you'll need to move yourself. Alternatively, if you've scouted out a great view from a particular vantage point, then you'll have to wait until the sun has moved in its arc to the appropriate place during its seasonal journey across the sky.
I opted not to resort to the use of any filters at all, in order to force myself to devise other means of making the subject look interesting.
Playing Favourites
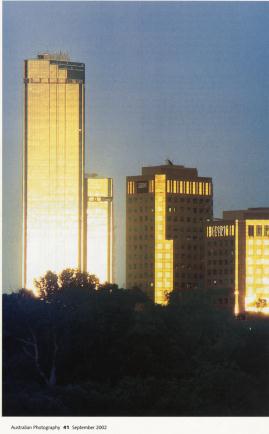
My favourite building in Melbourne, The Rialto, is also its tallest. Normally, you'll see this towering monolith as a none-too-inspiring grey colour. However, its highly reflective cladding allows it to take on the sun's colour. You just need to be at the appropriate angle and be waiting for when ol' Sol puts on a good display (see Image 2). There's no certainty with this, of course, so bring forward your best spiritual qualities of patience, persistence and perseverance. Sure, you could slip some filters over your lens, but these generally look obvious to the discerning eye (especially your eye). In any case, you don't get the same inner feeling of joy from having had to do it "the hard way", in meeting Nature's challenge.
See What Can Be
It's quite easily possible to go past the same scene every single day and yet never recognise the latent photographic potential hidden therein. Exploit your camera's ability to "compress" time into a single frame. With reference to Image 17: here, a lengthy exposure allows the trails of light to merge into a smooth continuum. Now, the cars travelling on a freeway have been photomagically transformed into a gracefully flowing river of light.
Buildings and Their Neighbours
Rather than always isolating a particular building, it's worthwhile also to show it in context, "nestled" into its environment amongst other buildings. These may be of similar vintage and/ or architectural style, or, even more dramatic, from a widely varying era and of markedly different design (see Image 3).
Pulse of the City
Every city has its own energy (spirit, or living essence). Each photographer will feel and experience that in a different way. This will be reflected in the kinds of images we will pursue: we all have our own unique manner of relating to the world!
When first starting out in a different area of photography, it's fine to attempt to emulate certain kinds of images that you've seen created by other photographers. This helps you prove to yourself that you've understood the fundamental principles involved and have mastered the necessary techniques. Then, aim to rapidly develop your own style, as a means of creatively expressing your individuality.
Other Themes Within the City
There are two further, characteristic aspects of a city which need to be included for your comprehensive coverage:
1.) Daily commuting;
and
2.) Traffic congestion (on freeways, etc.)
These can be incorporated as themes within your portfolio of city shots, or else worked in their own right. Some examples are provided herein.
Which Film?
It's horses for courses when it comes to your choice of film. Beware, though, that each film's major advantages are also its greatest downfalls. For instance, a high contrast transparency (slide) film - such as the cult status Fujichrome Velvia - will give you very "punchy" images. Hand in hand with that, there's not much exposure latitude possible. In a scene with a wide variation of light intensity between the brightest highlights and the deepest shadows, you'll end up with burnt-out highlights and blocked-up shadows, if you expose for the mid-tones. This will occur over a range of only about 4 stops.
Conversely, a low contrast film would better allow you to retain detail across a wider range of brightness levels. However, the image wouldn't "jump out" at you nearly as much.
Many of the newer emulsions feature a warm-tone characteristic, so - often - a warming filter over the lens isn't even necessary.
If you're principally interested in conveying the sense of line, design and form, then perhaps Black and White would be a better choice for you. Eliminating the distraction of colour forces the eye to pay greater attention to the graphic aspects of your subject. A further advantage is the wider exposure latitude of a B&W negative (approximately 10 stops) as compared to both colour negative, and - even more so - transparency film.
An easy entry point into the B&W world is via a chromogenic emulsion, such as Kodak's T400CN, or its consumer-oriented sibling, Black & White + 400. Ilford have their XP2 (also ISO 400). This class of film is processed in C-41 (colour negative) chemistry ie. at your local MiniLab!
One More Shot
When you think you've exhausted all the possibilities for shooting a given subject, remember: there is always one more way! Force yourself to find it.
Conclusion
When next wandering around your town or city, ensure your camera is loaded with film and ready to go. Actively observe and continuously imagine how buildings, man-created features and architectural details would (and could) look in an image. Notice how the word "imagine" contains the word "image"? There's a powerful reminder for you!
Practice mentally drawing a picture frame around potential subjects and envisioning what effect different focal length lenses would have. For instance, a wide-angle lens "stretching" apparent distance between foreground and background compositional elements, or a telephoto apparently "stacking" the image planes.
Equipment Details
Unless otherwise specified:- Canon EOS A2E used with: Manual Exposure; Manual Focus; Spot Metering; Mirror Lock-up; Remote Cable Release; Tripod; Sigma 28-200 mm, f/3.8-5.6, occasionally with Kenko MC7 2X Teleconverter
Captions
<Prints>
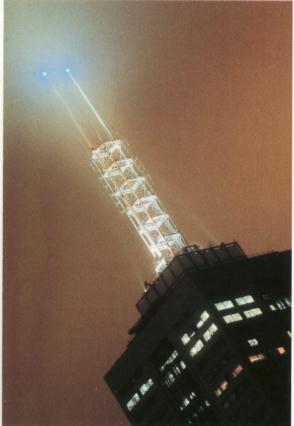
Image 1 Reaching for the Heavens Soaring skyscraper....... and stunning Art Deco architectural details. Manhattan's Chrysler building is a reflection of the vision of its architect. This building was first created in his imagination. A single picture can't adequately convey the multi-faceted personality of such an awe-inspiring creation. I sought to represent:
1.) the "height" aspect (by taking this shot from street level and angling the lens upwards to create the converging lines);
2.) the reflective nature of both the spire and the chrome panelling towards the top of the building (here, gleaming in the early afternoon sun and drawing the eye towards the highlights)
Notice also how the eagle gargoyles on the corners stand as silent sentinels over the city they survey.
Nikon F801 used with: Aperture priority; Automatic Focus; Matrix Metering; handheld; Nikkor 70-210mm f/4-5.6 AF zoom lens, Fujicolor HG 400.
Image 2 Rialto on Show When you find a subject (eg. building) you really like, work it from as many angles as possible, and return under varying atmospheric conditions and times of day, striving to portray it in different ways. This view is from the Shrine of Remembrance; the distance involved dictated the use of a 2X teleconverter, with my zoom lens set to 200mm. While this prevents keystoning (converging lines which make the building appear to taper towards the top), I had to be extremely careful in taking this shot. A strong wind was shaking my (flimsy) tripod, which was markedly magnified by such a long focal length.
Agfa Ultra 50
Image 3 Cathedral Spires and Modern Building Although "sandwiched" in between, and dwarfed by, the spires (an optical illusion caused by the compression effect of a long telephoto lens), the new city building still "pops out". That's because it is strongly reflecting the bright sunlight of late afternoon. I wanted to show the harmonious coexistence of the old and new, yet with each retaining its individuality and uniqueness.
Fujicolor NHG II (ISO 800)
Image 4 Flinders St. Station Dome and Modern Building Short and old, tall and new: two rooves, two spires....... yet, how styles have changed over the years! I wanted to dramatically illustrate the contrast, so I utilised a long telephoto lens (to make the buildings appear close together) from one of the platforms at the train station.
Fujicolor Superia 200
Image 5 City of Lights Seeking that "something different" in my depiction of this scene, I employed a double exposure, with the second exposure deliberately out of focus, to create a diffusion effect. Why carry filters, when you can get a similar result using your camera, and have control of the amount and "quality" of diffusion?
Fujicolor NHG II (ISO 800)
Image 6 Rooftop Light Show This building's lattice-like spire was being illuminated with a cyclically-varying display of gorgeous coloured light. I waited to catch the hues I most liked, setting a long enough exposure to account for the film's reciprocity failure.
Check the Technical Data Sheets, which are published by the manufacturers for their films. I much prefer to get hold of a glossy hard-copy; failing that, they're available from the respective Websites.
Normally, I avoid having all-black skies in my images by shooting while there's still some light remaining in the sky. But here, the totally dark welkin helps give definition and emphasis to the coloured light of the spire structure.
Fujicolor NHG II (ISO 800)
Image 7 Under an Alien Sky No, this wasn't the sky's colour. Rather, it was caused by the film I used, Fuji's NHG II (ISO 800), which suffered from reciprocity failure for exposures longer than 0.1s. In practical terms, what this means is that:
1.) longer exposures than those called for by the meter are required, since the film progressively loses sensitivity to light;
2.) colour shifts occur, since the various layers of the emulsion lose sensitivity at differing rates.
Each given emulsion behaves in its own particular way, so you'll need to experiment to determine what you like, as far as exploiting this characteristic for artistic effect.
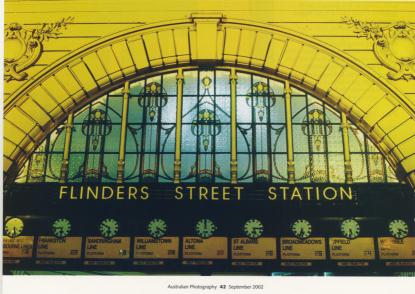
Image 8 Olde Worlde Train Station Yes, it's a cliché....... but I like it! Why? In part, because it evokes fond memories of catching the train into town as a young kid, with my two best childhood friends. What familiar sights in your city have a special place in your heart, an inner significance beyond the merely physical appearance?
The colour cast is due to the artificial illumination: that's the time, well before dawn! I wanted to show the lovely colour and texture of the stained glass, possible here because of the backlighting by the lamps of the great dome (which is such an integral part of both the structure and architecture).
Agfa Ultra 50
Image 9 Flinders St. Station Facade in Late Afternoon Light The sun was high enough to result in an interesting placement of shadows, yet sufficiently low to help define the form of the elaborate architecture. It wasn't even necessary to resort to the use of a polarising filter: that was the sky's true colour! This showed up very distinctly, even on an emulsion principally designed for portrait applications (fairly muted colour palette, and low contrast).
Fujicolor NHG II (ISO 800)
Image 10 Pretty as a Postcard Wandering around the city one night, I spotted an interesting looking, low-lying cloud formation, with its underside partially illuminated by "light pollution" from all the city lamps. So I hurriedly set up my camera, cable release and tripod. Yes, I know photography is meant to be a marvellously therapeutic and relaxing pastime, but, to paraphrase the oft-quoted saying: "Light and skies wait for no photographer". A latent image on your emulsion (or 1's and 0's in your memory) is far better than the vague idea that you'll come back and get it some other time: usually, circumstances don't cooperate so easily!
Fujicolor NHG II (ISO 800)
Image 11 7:07, City-bound For the majority of people, the city means daily commuting, most commonly by car and/ or train. I attempted to represent "The Journey" by means of the blurred trail of train lights as it departed from the last station on a suburban train line. To "compress" the scene's elements, I used the equivalent of a 400mm focal length, by fitting a 2X teleconverter to my zoom lens. There are enough static compositional elements in sharp focus from which the mind can discern that the train is moving relative to them.
Agfa Ultra 50
Image 12 Streaks of Light Since travel is such an integral part of living in a city, I went for an abstract interpretation. With my tripod-mounted camera on the train platform (and remote cable release poised in hand), I awaited the arrival of a night train. The shutter was released just as the train commenced to negotiate the bend, and left open till the train reached the camera's position.
Agfa Ultra 50
Image 13 Reflections on the River An almost abstract composition was inspired by these lights on a bridge spanning the river. To emphasise the reflections, yet show their origin, I used a double exposure, with the second exposure thrown completely out of focus. This made the reflections look wider, as well as turning the bridge lamp point sources of light into "balloons". Taken well before dawn, the overall effect is nearly monochromatic.
Fujicolor Superia 200
Image 14 Café not by Day I set up this shot at my Café late at night. Knowing that lengthy exposures would be required (after allowing for reciprocity failure of the film), and having to position myself on the opposite side of a major arterial road, I chose Sunday night, to minimise the number of cars going past.
Serendipity provided the shadowy figure, who just happened to amble into the scene with one of the exposures.
Aside from this "normal" shot, I employed a few other techniques to give some interesting variations with the subject's portrayal. One of these was to set an exposure of the order of 10 seconds; using a wide-angle setting on the zoom lens for the first 5 or so seconds, I then progressively (and smoothly) zoomed in for the remainder of the exposure. This results in a streaking of highlights; since results are somewhat unpredictable, some experimentation is required. Yet other compositions incorporated the trails of red and white lights of the passing vehicular traffic at night, to convey the sense of the Café being situated on a busy road.
Fujicolor NHG II (ISO 800)
Image 15 Café not by Day: Variation Same subject, but an alternative treatment, to obtain a different looking image. I took a double exposure, with the second exposure deliberately thrown out of focus. This creates a diffusion effect, particularly around the highlights. Exact results are not readily predictable. You can play with the amount of light permitted to strike the film for each of the in-focus and out of focus exposures, or the extent of the deliberate de-focusing, etc. Note that the effect is most pronounced at close to wide open apertures.
Fujicolor NHG II (ISO 800)
Image 16 Rushing Out of the City... to a standstill! Taken late in the evening, this image depicts the traffic getting banked-up. I sought to emphasise the arc described by the cars, which were slowing down and eventually coming to a complete stop. The overall red cast of this picture was caused by my film over an exposure of several seconds.
Fujicolor NHG II (ISO 800)
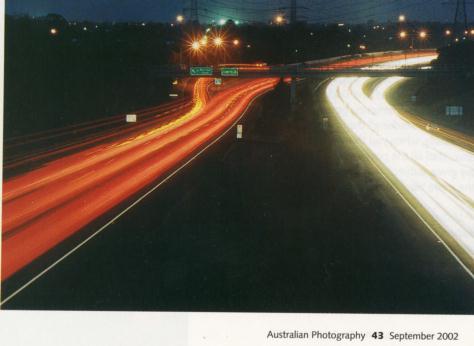
Image 17 All Roads Lead To... the city! An exposure of two minutes was required, due to the low light levels and to compensate for reciprocity failure (refer to the technical Data Sheets for your particular film). By looking through my camera's viewfinder as I walked along a pedestrian bridge above the freeway before dawn, I determined the best position to set up my tripod. Next, I fine-tuned the composition by choosing the focal length setting on my zoom lens which resulted in the "rivers of light" entering from the corners of the frame.
Fujicolor NHG II (ISO 800)
<Slides>
Image 18 Sprawling City Skyline Office windows show up on film as green due to the predominantly fluorescent illumination (discontinuous spectra). Note that, to avoid atmospheric diffraction effects, good conditions are necessary for a clear view across such a long distance: 12 km over water (remember Twinkling, Twinkling Little Star?) Here, I had to use a 2X teleconverter on my zoom lens set to 200mm.
Fujichrome Velvia at ISO 50
Image 19 Melbourne in the Morning Synonymous with Melbourne is the Yarra River. Here, I incorporated it as a major element in the composition, with its sweeping curve leading to the city buildings which are reflecting the rising sun's warm glow. The eye is instinctively drawn to the highlights.
Fujichrome Provia 100F at EI 400
Image 20 Rialto Aglow A 2X teleconverter was fitted to my lens which was then zoomed towards the long end of its range to obtain the composition I sought. Unfortunately, I had a high contrast slide film in my camera at the time I sighted this scene; even worse, the film was being pushed two stops, resulting in further build-up of contrast. Thus, it wasn't possible to obtain an exposure which would maintain detail in the midtones, as well as the highlights and shadows, in a scene with such a wide range of brightness levels.
Fujichrome Provia 100F at EI 400
Image 21 Fireworks Fantasia Major festivities in capital cities often conclude with a fireworks finale, adding yet another dimension to the city splendour.
Olympus OM20 with mechanical Cable Release, Tripod-mounted; Zuiko 35-70mm f/4; Aperture at f/11; Manual Focus (at infinity); Bulb setting (exposure approximately 30 elephants!)
Kodak Elite Chrome II at ISO 100
Image 22 After the Fireworks The dissipating smoke trails lend an air of mystery to this night scene.
Olympus OM20 with mechanical Cable Release, Tripod-mounted; Zuiko 35-70mm f/4; Aperture set to f/11; Manual Focus (at infinity); Bulb setting (exposure approximately 30 elephants!)
Kodak Elite Chrome II at ISO 100
* * * * * * *
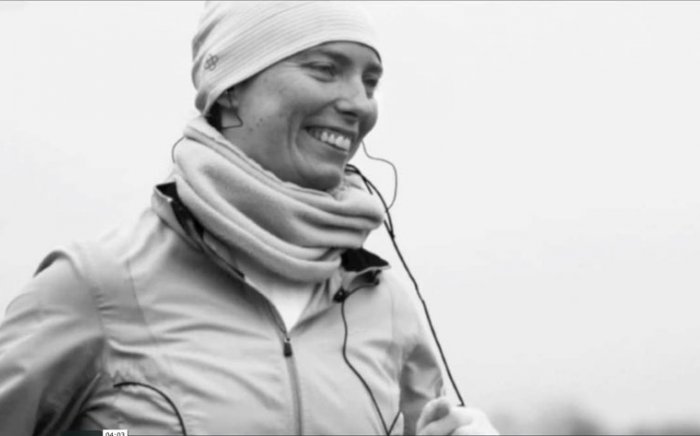
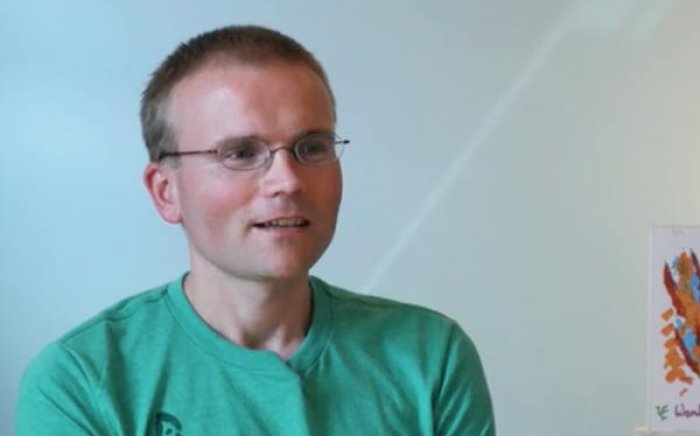
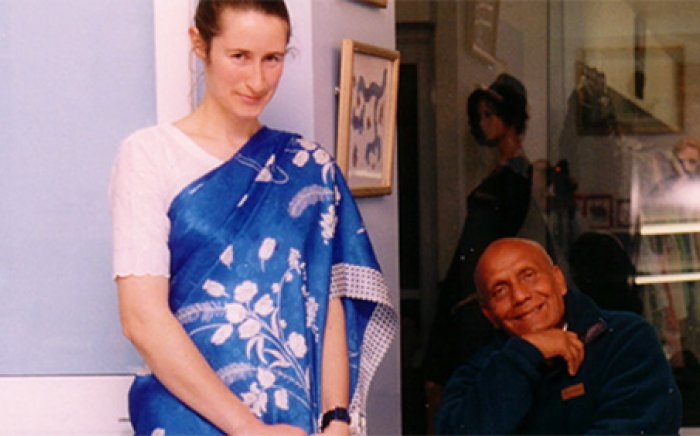
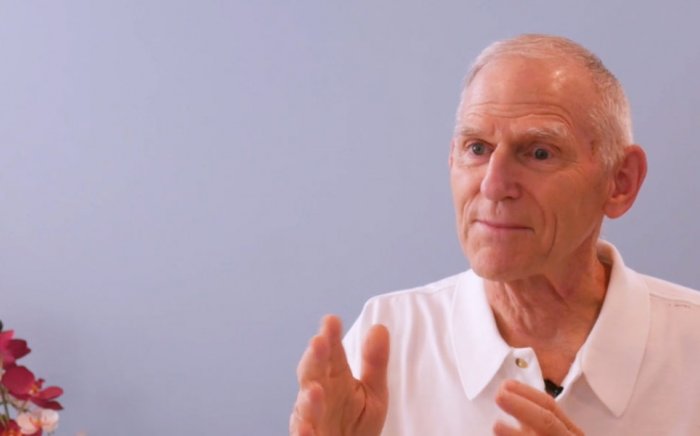
First-hand experiences of meditation and spirituality.


interviews with Sri Chinmoy's students


Except where explicitly stated otherwise, the contents of this site are licensed under a Creative Commons Attribution-NonCommercial-NoDerivs 3.0 Unported License. read more »
SriChinmoyCentre.org is a Vasudeva Server project.